 Save
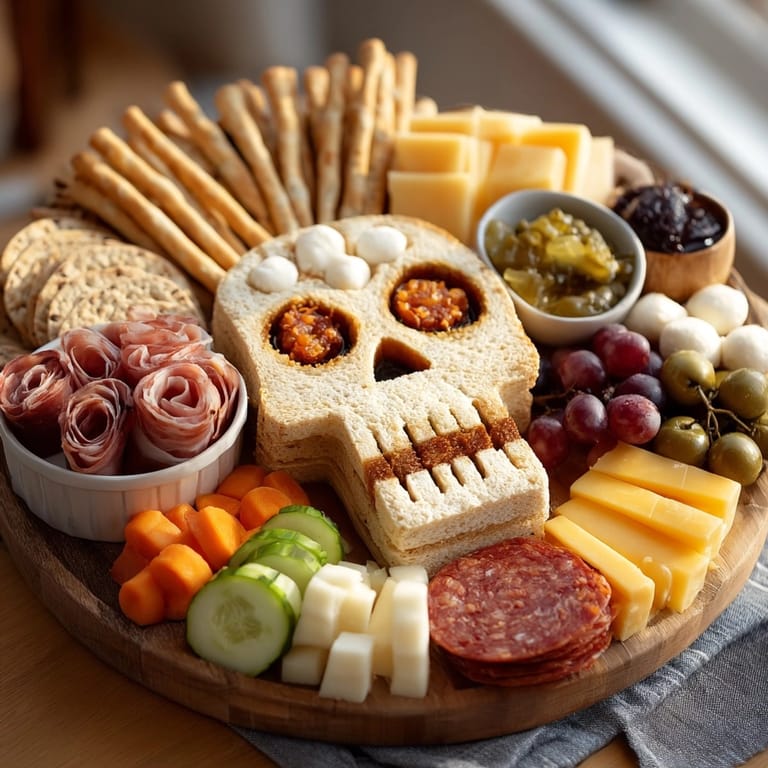
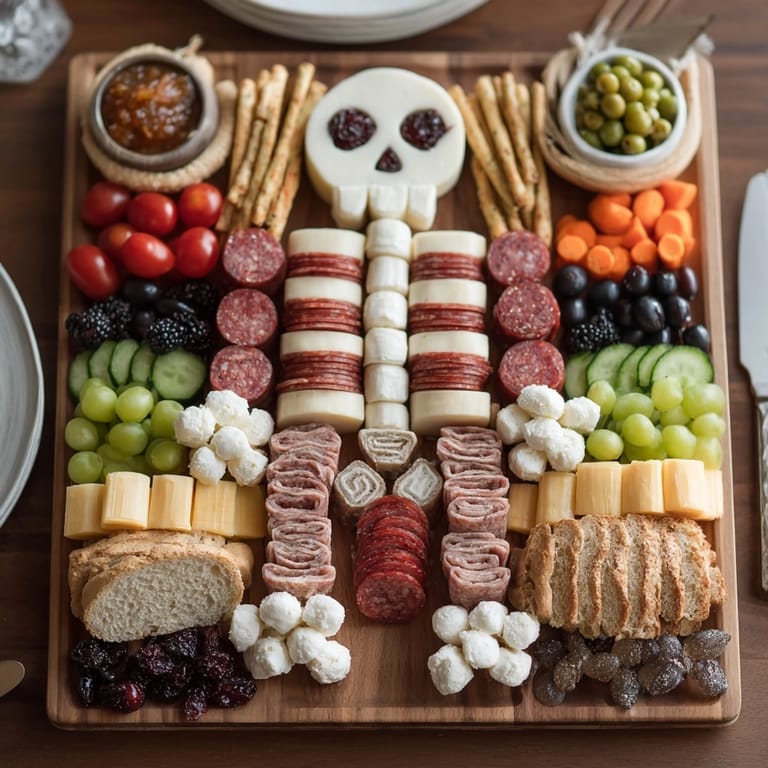
Save Creating a skeleton charcuterie board always brings out laughs and delight at Halloween parties. Not only does it look impressively playful and spooky on the table, but the spread of meats, cheese, fruits and veggies means every guest finds something to nibble. Building the skeleton design feels like playing with edible puzzle pieces and it quickly becomes a centerpiece that everyone gathers around. I first put this together for a kid's party and now it has become a must-do tradition every October.
My favorite part is watching friends light up when they spot the skeleton's bones made out of brie or mozzarella balls. Last year, my sister tried making one for her work event and told me the board was the highlight of the night.
Ingredients
- Prosciutto: gives that delicate melt-in-your-mouth texture and the slight saltiness pairs with creamy cheeses. Pick thinner slices for better folding.
- Salami: brings in classic cured flavor and goes well with grapes and cheeses: choose a mild or spicy type depending on your crowd.
- Spicy chorizo slices: add a punch and vivid color: look for Spanish chorizo for best bold flavor.
- Mortadella: is mild, creamy and easy to roll or place as limbs: check for high-quality ones with visible pistachio bits.
- Brie cut into bone shapes or wedges: makes a perfect creamy base for the skull and bones: buy double cream for better texture.
- White cheddar slices shaped as rectangles or sticks: create rib details: look for a sharp cheddar as it holds shape.
- Mozzarella balls bocconcini: double up as skull features and joints: pick fresh, pearly balls for soft bite.
- Goat cheese rolled into small balls: for joint accents: choose log-style goat cheese for easiest rolling.
- Water crackers: offer crunch and are neutral in flavor: look for sturdy ones that can hold a smear of cheese.
- Breadsticks: become edible bones: try to find thin and crisp ones for best skeletal effect.
- Baguette slices: are for gluten-free guests or those who want a heartier bite: get freshly baked for better texture.
- Black grapes: create dark eyes and fill gaps with sweetness: select plump and firm grapes.
- Green grapes: add a burst of color: mix with black grapes for eye-popping contrast.
- Baby carrots: outline the board, adding crunch and orange color: choose slender, evenly sized carrots for easy arranging.
- Cucumber slices: bring freshness and light green for a pop: firm cucumbers slice best.
- Cherry tomatoes: dot the skeleton or board: look for shiny and deep-colored tomatoes for maximum visual appeal.
- Green olives and black olives: are perfect facial features and snack bites: opt for pitted for easy eating.
- Cornichons: are tangy and crunchy fillers: buy whole, crisp cornichons jar.
- Fig jam: gives sweetness and balance: choose thick jam with visible fig seeds for texture.
- Whole grain mustard: adds zing and looks nice in little bowls: pick one with visible grains for pretty effect.
Tired of Takeout? 🥡
Get 10 meals you can make faster than delivery arrives. Seriously.
One email. No spam. Unsubscribe anytime.
Instructions
- Choose Your Platter:
- Pick a large wooden board, marble platter or sturdy tray. Lay parchment paper if you want for easy cleanup. Make sure you have small bowls and cheese knives.
- Arrange the Skeleton Skull and Bones:
- Start with cheeses. Use brie and mozzarella balls to create the skeleton's skull shape at the top center. Cut cheddar into rectangles for ribs down the torso and goat cheese balls for joints like elbows or knees. Shape the brie into rough bones, wedges or skull.
- Layer Meats for the Skeleton Body:
- Fold prosciutto and layer across the chest and limbs, alternating with salami slices and spicy chorizo. Roll mortadella for easy leg or arm shapes. Layer with overlapping edges for texture and definition. Fill the body's outline with meats for visual impact.
- Build Bone Shapes with Breadsticks and Crackers:
- Lay breadsticks where arms and legs should go, angled out to suggest limbs. Stack water crackers and baguette slices as bones or frame the skeleton. Alternate types for color and crunch.
- Add Face and Details with Grapes and Olives:
- Select black grapes for eye sockets and place green grapes next to them for a pop. Nestle green olives as nostrils or mouth, and scatter black olives for playful facial holes.
- Outline and Fill with Fruits and Vegetables:
- Spread baby carrots around the skeleton's body as a bright outline. Alternate cucumber slices and cherry tomatoes to fill in edges and add brightness. Leave no gap for the playful, full look.
- Accessorize with Jams, Mustards and Pickles:
- Put cornichons, fig jam and mustard in small bowls. Place these around skeleton's hands, or dot them around board edges for guests to grab easily. Keep them within reach of crackers and cheeses.
- Final Adjustments and Serve:
- Step back and check the skeleton effect. Move meats or cheese as needed to sharpen the shapes. Fill any bare spots with small fruits or cheese balls. Set out cheese knives, tongs and forks for mess-free serving. Serve right away for freshest flavor.
 Save
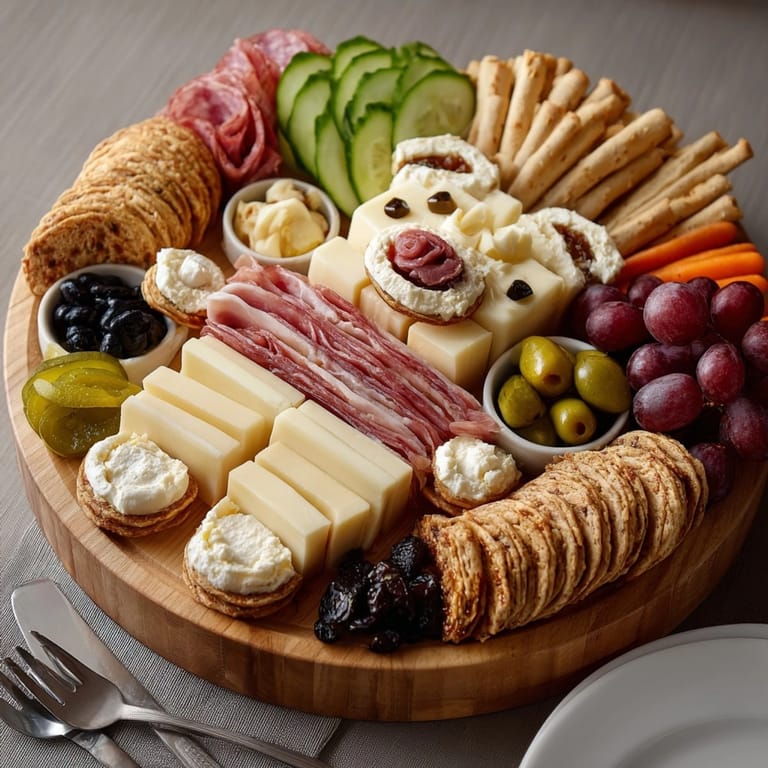
Save My personal favorite is cutting extra brie into little bone shapes which makes kids laugh every single year. My family always takes photos with the skeleton board before digging in: now it is a highlight at our gatherings.
Storage Tips
Keep all ingredients chilled before assembly for easy handling and freshness. Once built, serve within two hours for best taste and food safety. If you have leftovers, transfer meats and cheeses to airtight containers and eat within two days.
Ingredient Substitutions
Swap meats with roasted or grilled veggies like mushrooms, eggplant or bell peppers for vegetarian guests. Try crackers made from rice or seeds to make the board entirely gluten-free. Use any soft cheese for the bones if you cannot find brie.
Serving Suggestions
Serve with Halloween-themed toothpicks or napkins for fun. Offer dipping bowls of honey or balsamic glaze on the side. Set out extra fruit or nuts for extended grazing.
Cultural Historical Context
Charcuterie boards come from French culinary tradition but the skeleton design gives it an American twist, perfect for Halloween. Using cured meats, cheese and fruits also celebrates seasonal harvest and festive sharing.
Seasonal Adaptations
Use fresh figs or apples when grapes are out of season. Substitute cherry tomatoes with diced roasted pumpkin for autumn color. Include rosemary sprigs to add a woodsy, seasonal touch.
Success Stories
Kids love building their own mini skeleton boards with veggies and cheese. Guests always come back for seconds and you see even adults playing with the arrangement. Last year, my friend's party was a hit because people loved posting photos with her charcuterie skeleton.
Freezer Meal Conversion
This board is not ideal for freezing. The textures and color of cheeses and cured meats change after chilling. It is best eaten fresh and assembled right before serving.
 Save
Save Enjoy making this skeleton board for Halloween: everyone will remember it as the playful, creative highlight of your party.
Recipe Questions & Answers
- → How do I shape the skeleton with ingredients?
Use cheeses for bones and skull, layer sliced meats for the body, and position breads for limbs. Grapes and olives create facial features.
- → Can I make this board vegetarian?
Absolutely! Omit meats and increase cheese variety or add seasonal roasted vegetables.
- → What accompaniments work best?
Small bowls of fig jam, mustard, cornichons, and mixed olives complement the flavors and add festive touches.
- → What tools do I need for assembly?
A large platter or board, cheese knives, small bowls for condiments, and tongs or serving forks are recommended.
- → How do I serve for maximum visual impact?
Create the skeleton shape at the center, use fresh vegetables to outline or fill gaps, and add themed picks for extra flair.
- → What wine pairs well with this board?
A light red wine such as Pinot Noir or sparkling water matches the board’s varied flavors and textures.