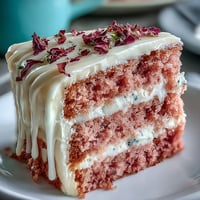
 Save
Save There's something almost magical about watching cream transform into glossy ganache, and I discovered that magic on a rainy Saturday when a friend challenged me to make fancy chocolates from scratch. I'd always assumed truffles required professional equipment and years of training, but standing in my tiny kitchen with just a bowl, some good chocolate, and heavy cream, I realized the real secret was patience and quality ingredients. These little spheres of indulgence became my go-to gift, the thing people actually asked me to make again.
I'll never forget bringing a batch to my sister's book club and watching them disappear in minutes while everyone debated whether the cocoa-dusted ones or the nut-rolled versions were better. She texted me the next day asking if I could make them monthly, which is basically the highest compliment a baker can receive from family.
Ingredients
- Good-quality dark chocolate (60–70% cocoa), chopped: Don't skimp here because chocolate is literally your main ingredient, and the better the chocolate, the silkier your ganache will be.
- Heavy cream: This is what creates that velvety texture everyone raves about, so use the real thing and not a substitute.
- Unsalted butter, softened: It adds richness and helps achieve that glossy finish that makes truffles look professionally made.
- Pure vanilla extract (optional): A teaspoon adds depth without overwhelming the chocolate's natural flavor, though it's truly optional.
- Cocoa powder, chopped nuts, shredded coconut, or powdered sugar: These are your customization playground where you can play with textures and flavors based on what you're craving.
Tired of Takeout? 🥡
Get 10 meals you can make faster than delivery arrives. Seriously.
One email. No spam. Unsubscribe anytime.
Instructions
- Gather your chocolate and prepare for the heat:
- Chop your chocolate into small, even pieces so it melts quickly and evenly when the hot cream hits it. Using a heatproof bowl that won't crack or conduct heat too aggressively is worth the small effort of finding the right one.
- Heat the cream until it whispers steam:
- Watch the cream carefully as it warms over medium heat until tiny bubbles gather at the edges and you see a faint wisp of steam. The goal is just simmering, not a rolling boil, which would change the texture of your final ganache.
- Let the heat do the melting work:
- Pour that gorgeous hot cream over the chopped chocolate and resist the urge to stir immediately. After two minutes, the residual heat will have softened the chocolate enough that a gentle stir brings everything together into liquid silk.
- Fold in butter and vanilla for polish:
- The softened butter incorporates smoothly into the warm ganache and adds a subtle shine that signals you've created something special. Add vanilla if using, just enough to complement rather than announce itself.
- Chill your ganache until it's workable:
- Cover the bowl and let it sit in the refrigerator for at least two hours until it's firm enough to scoop but still soft enough to shape. This waiting period is when the real magic happens as flavors meld and texture becomes creamy rather than liquid.
- Shape with speed and confidence:
- Line your baking sheet with parchment paper, then work quickly with a melon baller or teaspoon to scoop and your warm palms to shape each truffle. The key is moving fast so your body heat shapes the ganache without melting it into a puddle.
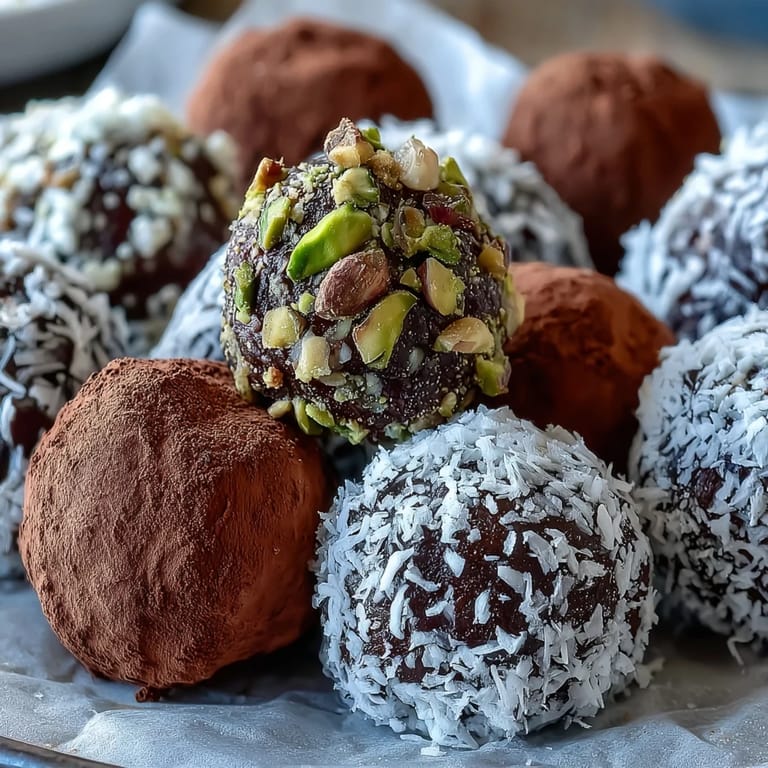
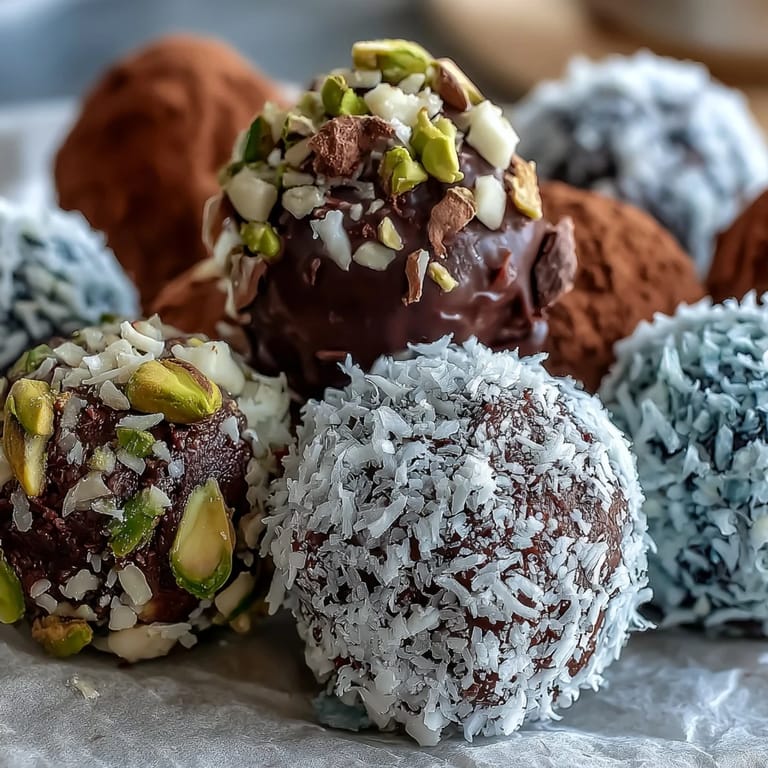
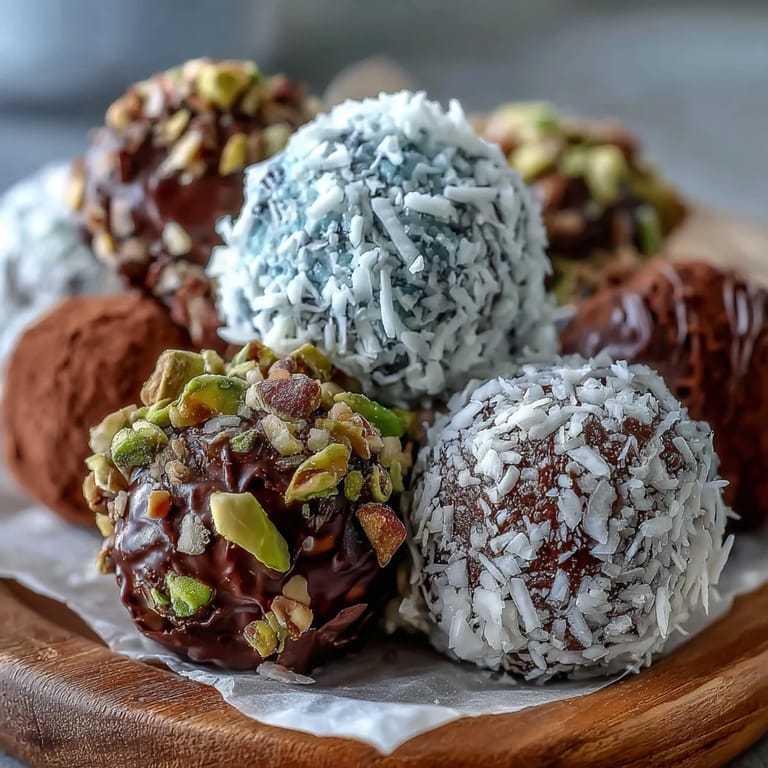
- Roll in your chosen coatings:
- Pour your coating choices into shallow bowls and roll each warm truffle until completely covered, which takes just seconds per piece. The variety of coatings is where your personal touch really shows.
- Final chill before tasting:
- Give them one more thirty-minute refrigerator rest to set the coating and achieve that perfect texture. This final step ensures the inside stays creamy while the coating sets firm.
 Save
Save There was one evening when my daughter helped me roll these for a charity bake sale, and she insisted on creating her own coating combination with crushed cookies mixed with cocoa powder. Those truffles sold out first, and that's when I realized these aren't just candy, they're edible creativity.
Flavor Variations Worth Exploring
Once you master the basic ganache, the flavor possibilities expand infinitely and this is where home baking beats commercial candy every time. I've infused the cream with orange zest for a bright complexity, stirred in espresso powder for chocolate lovers who want a subtle coffee note, and even added a splash of liqueur for grown-up gifts. Each infusion goes directly into the cream before heating, which means the flavors develop as the cream warms rather than fighting for space with the chocolate.
Storage and Longevity
These truffles sit happily in an airtight container in the refrigerator for up to a week, though they rarely last that long in my house. Bringing them to room temperature before serving actually makes them creamier and more indulgent, which surprised me the first time I learned it. The cold firms them up a bit too much, so five to ten minutes at room temperature unlocks their full potential.
Pairing and Presentation
These pair beautifully with rich port wines or sweet dessert wines if you're feeling fancy, but honestly they're perfect with coffee or even on their own. I've learned that serving them in small paper liners or nestled on a piece of parchment feels more special than just tossing them in a bowl, even though it's the same truffles. The presentation transforms a homemade treat into something that feels intentional and gift-worthy.
- Dust with powdered sugar for an elegant, almost jewel-like appearance that catches the light.
- Layer different coatings so each row looks distinct and guests can choose their favorite.
- Keep them cool until the last possible moment so they stay glossy and firm rather than soft.
 Save
Save Making truffles transformed how I think about homemade gifts, because something so small can carry so much intention and care. These little chocolates remind me that elegance doesn't require complexity, just quality ingredients and patience.
Recipe Questions & Answers
- → What type of chocolate works best for truffles?
Use good-quality dark chocolate with 60-70% cocoa content for the perfect balance of richness and sweetness. Higher quality chocolate creates a smoother, more luxurious ganache with better flavor.
- → Why are my truffles melting when I roll them?
The ganache needs to be properly chilled for at least 2 hours until firm. Work quickly with small portions, and keep your hands cool. If the mixture becomes too soft, return it to the refrigerator for 15-20 minutes.
- → Can I add flavors to the ganache?
Absolutely! Infuse the cream with orange zest, add a teaspoon of espresso powder, or stir in a tablespoon of liqueur like Grand Marnier, rum, or Baileys after the butter for delicious variations.
- → How should I store homemade truffles?
Store in an airtight container in the refrigerator for up to one week. Layer them with parchment paper to prevent sticking. Bring to room temperature 15-20 minutes before serving for optimal texture and flavor.
- → What coatings work best for chocolate truffles?
Classic options include unsweetened cocoa powder, finely chopped toasted nuts like hazelnuts or almonds, shredded coconut, or powdered sugar. You can also try crushed cookies, sprinkles, or melted tempered chocolate for variety.
- → Can I make truffles without heavy cream?
Heavy cream creates the ideal velvety texture, but you can substitute with coconut cream for a dairy-free version. Avoid milk or half-and-half as they contain too much water and won't set properly.