 Save
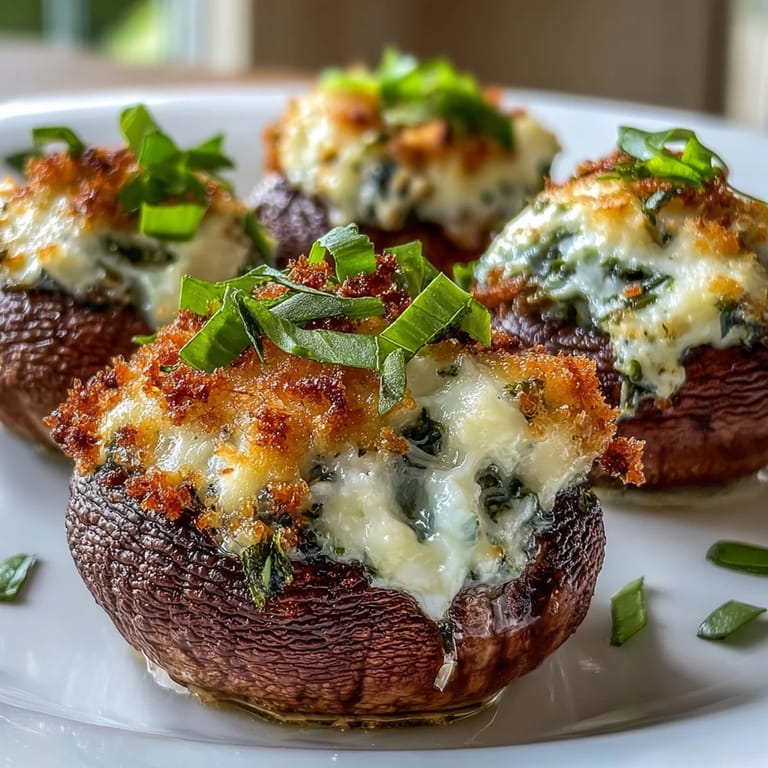
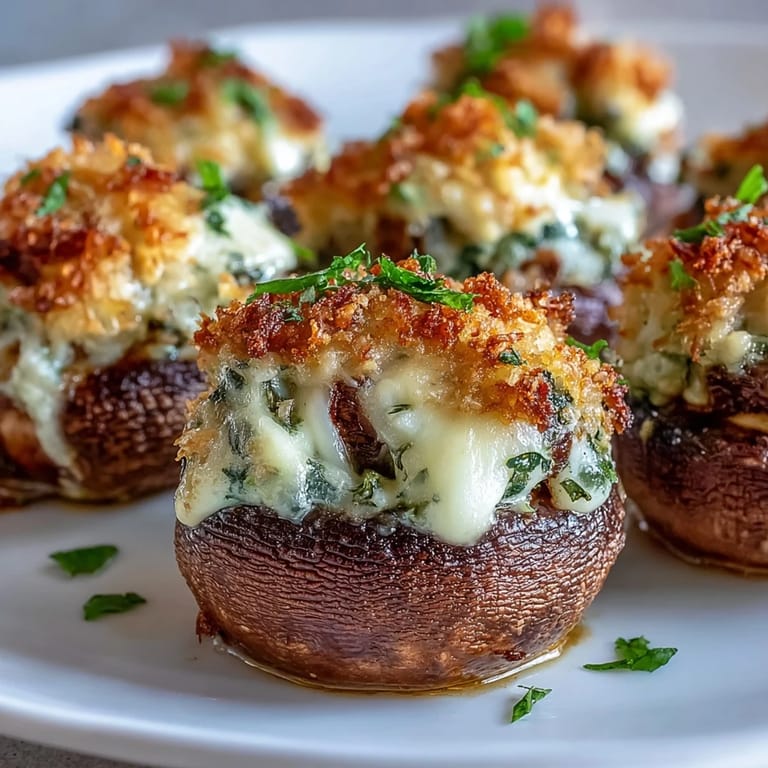
Save My neighbor brought these to a dinner party years ago, and I watched people gravitate toward them like moths to a flame—even the ones who claimed they didn't eat mushrooms suddenly had one in hand. What struck me wasn't just how elegant they looked on the platter, but how she made it seem effortless, pulling them warm from the oven with that golden cheese bubbling on top. I finally asked for her approach, and she laughed, saying the secret was treating the mushroom caps like little vessels worth filling thoughtfully. Now when I make them, I understand exactly what she meant.
I made these last spring when my sister announced her engagement at a family lunch, and my mom requested them for the casual celebration dinner that followed. Standing in the kitchen prepping mushrooms while everyone laughed in the living room, I realized these little bites had become my quiet contribution to moments that mattered—nothing flashy, just consistently delicious and present.
Ingredients
- Cremini or white button mushrooms (24 medium, stems removed): These sturdy caps hold the filling without collapsing, and cremini have a deeper flavor than white buttons if you want something earthier—just make sure they're roughly the same size so everything bakes evenly.
- Olive oil (3 tablespoons total): Use something you actually like tasting, not the cheapest bottle; it's a supporting player here but makes a real difference in richness.
- Reserved mushroom stems, finely chopped: Don't throw these away—they're umami gold and make the filling taste intentional rather than generic.
- Garlic (2 cloves, minced): Fresh and sharp, it becomes mellow and sweet once sautéed, anchoring the whole filling with savory depth.
- Asiago cheese (2/3 cup grated, plus 2 tablespoons for topping): This is the star—nutty, slightly granular, and it melts into creamy pockets while keeping its personality, so don't substitute it without reason.
- Cream cheese (1/3 cup, softened): It acts as a binder and adds silky richness; warming it to room temperature before mixing saves you from lumps.
- Panko breadcrumbs (1/3 cup): Panko stays crispier than regular breadcrumbs, giving texture that matters, though regular breadcrumbs work if that's what you have.
- Fresh basil (1/4 cup, finely chopped): This is where brightness lives in the filling—tear it by hand if possible rather than chopping with a knife, which bruises the delicate leaves.
- Fresh parsley (2 tablespoons, chopped): It's quieter than basil but adds earthiness and a visual hint of green throughout the filling.
- Black pepper and salt (1/4 teaspoon and 1/8 teaspoon): Season conservatively since Asiago is already salty; you can always add more but can't take it back.
Tired of Takeout? 🥡
Get 10 meals you can make faster than delivery arrives. Seriously.
One email. No spam. Unsubscribe anytime.
Instructions
- Heat your oven and prep your stage:
- Set the oven to 375°F and line a baking sheet with parchment paper—this prevents sticking and makes cleanup almost joyful. Have everything within arm's reach before you start; mise en place might sound fancy, but it's really just being kind to yourself.
- Clean and hollow the mushrooms:
- Gently clean each mushroom cap with a damp paper towel, then carefully push out the stem and use a small spoon or your thumb to create a shallow well without breaking through the bottom. The stems go straight into your ingredient bowl—don't waste them.
- Sauté the stems and garlic until fragrant:
- Heat a tablespoon of olive oil in a skillet over medium heat, add your finely chopped stems and minced garlic, and listen for the gentle sizzle that tells you things are cooking. After 3 to 4 minutes, when the mushrooms have released their moisture and the garlic smells sweet rather than sharp, pull it off heat and let it cool—this step deepens the flavor and prevents a watery filling.
- Mix the filling until everything is unified:
- In a bowl, combine the cooled mushroom mixture with Asiago, cream cheese, breadcrumbs, basil, parsley, pepper, and salt, stirring until the texture is even and creamy. Take a moment to taste a tiny bit on your finger; adjust seasoning if it needs it.
- Fill each cap with confidence:
- Spoon the filling generously into each mushroom cap, pressing it down gently so it settles but doesn't explode out the sides—aim for slightly mounded and rustic rather than surgical. Arrange them on your prepared baking sheet in a single layer.
- Add the final touch of richness:
- Drizzle each stuffed mushroom lightly with olive oil and sprinkle with a pinch of the remaining Asiago cheese, which will catch the heat and turn golden and crispy.
- Bake until golden and tender:
- Slide them into the oven for 18 to 20 minutes—they're done when the mushrooms look soft and the cheese on top has turned a pale golden brown. Watch them toward the end so they don't tip into overdone, but don't stress too much; they're forgiving.
- Rest and serve:
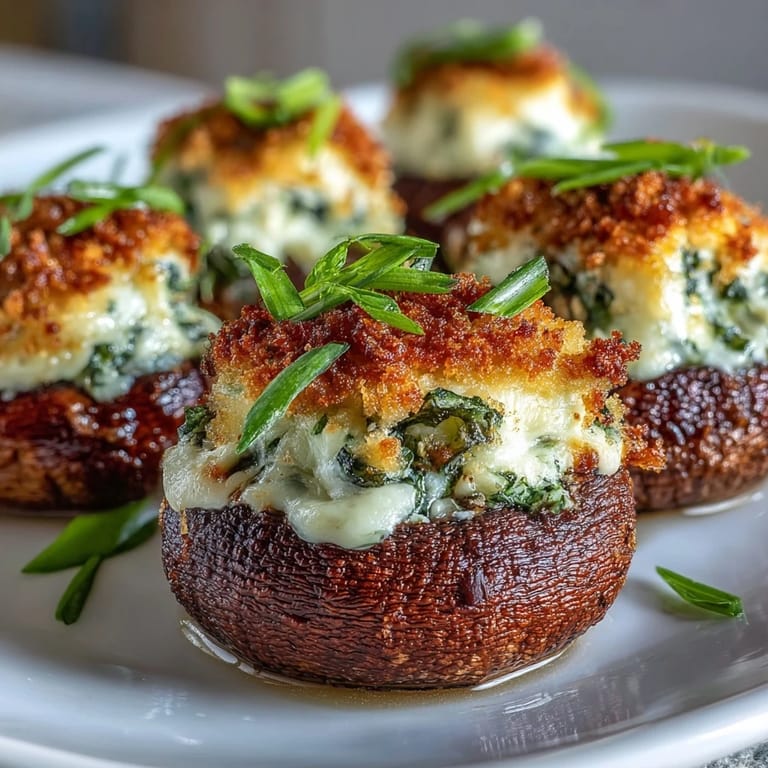
- Let them cool for just a couple of minutes so you don't burn your mouth, then arrange them on a platter and maybe scatter a few fresh basil leaves on top for color and a whisper of freshness.
 Save
Save There's a moment just after these come out of the oven, while they're still warm and the cheese is at its most inviting, when someone always reaches for one and closes their eyes after the first bite—that's when you know you've made something worth making. Those small reactions, repeated across a table, remind me why these mushrooms have lived in my rotation for so long.
The Asiago Question: Why This Cheese Matters
I spent years substituting Asiago with whatever hard cheese was on sale, and while the mushrooms still tasted fine, something essential went missing—a subtle nuttiness and slight crystalline texture that made each bite feel intentional. One afternoon I finally splurged on real Asiago, and the difference was quiet but undeniable; it's worth seeking out at a proper cheese counter rather than settling for pre-grated. The investment isn't huge, but the result feels noticeably more refined, and that matters when you're serving food meant to impress.
Timing and Temperature: The Quiet Foundations
Baking at 375°F is a deliberate choice—hot enough that the filling gets creamy and the tops brown, but gentle enough that the mushroom caps stay tender rather than turning leathery and sad. I learned this the hard way by once cranking the oven to 425°F thinking speed mattered; they were done in 12 minutes but the edges had already started to shrivel. Now I set a timer for 18 minutes, check at that point, and rarely need the full 20—watching them in the final moments pays off.
Making Them Your Own
The beauty of this filling is that it welcomes small variations without losing its soul—some people add a pinch of red pepper flakes for heat, others swap in different herbs depending on the season or what's in their garden. I once made a version with crispy pancetta mixed into the filling for a dinner party with carnivores, and while it shifted the vibe, it absolutely worked.
- Try swapping half the Asiago for sharp Pecorino if you want something more assertive and peppery.
- If fresh basil isn't available, a combination of fresh parsley and dried Italian seasoning keeps things respectable and honest.
- Cold mushrooms can be filled hours ahead and baked just before guests arrive, making them a perfect make-ahead appetizer.
 Save
Save These mushrooms have become my answer when someone asks what to bring to a gathering where you want to contribute something that feels thoughtful without demanding hours in the kitchen. They're a small kindness, really, dressed up in cheese and herbs and golden-brown edges.
Recipe Questions & Answers
- → Can I prepare these stuffed mushrooms ahead of time?
Yes, you can assemble the stuffed mushrooms up to 24 hours in advance. Cover them tightly with plastic wrap and refrigerate. When ready to serve, bring them to room temperature for 15 minutes, then bake as directed, adding 2-3 extra minutes if needed.
- → What type of mushrooms work best for stuffing?
Medium-sized cremini or white button mushrooms are ideal because they have sturdy caps that hold the filling well. Look for mushrooms that are 1.5 to 2 inches in diameter with firm, intact caps for the best presentation.
- → How do I prevent the mushrooms from getting watery?
Sautéing the chopped mushroom stems until the moisture evaporates is key. Also, avoid washing mushrooms under running water; instead, wipe them clean with a damp cloth. This prevents excess moisture that can make the filling soggy.
- → Can I freeze stuffed mushrooms?
Yes, you can freeze them before or after baking. To freeze unbaked, arrange on a baking sheet until solid, then transfer to a freezer bag. Bake from frozen, adding 5-7 minutes to the cooking time. Baked mushrooms can be frozen and reheated at 350°F for 10-12 minutes.
- → What can I substitute for Asiago cheese?
Parmesan, Pecorino Romano, or Gruyère are excellent alternatives that provide similar nutty, savory flavors. For a milder taste, try white cheddar or fontina. Use the same measurements as specified for Asiago.
- → How do I know when the stuffed mushrooms are done?
The mushrooms are ready when they're tender when pierced with a fork, the filling is heated through, and the tops are golden brown. This typically takes 18-20 minutes at 375°F. Avoid overbaking, as the mushrooms can become rubbery.