 Save
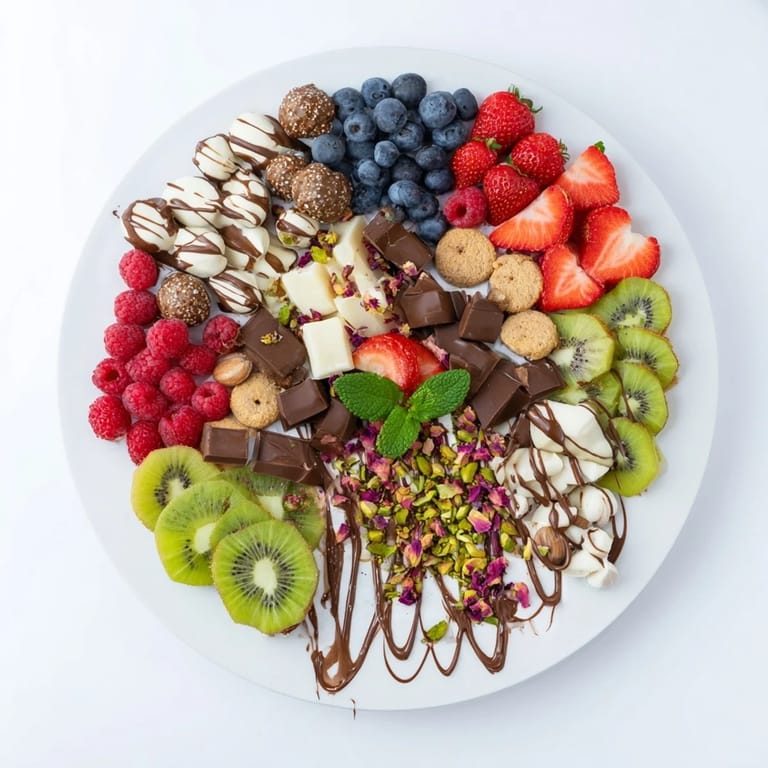
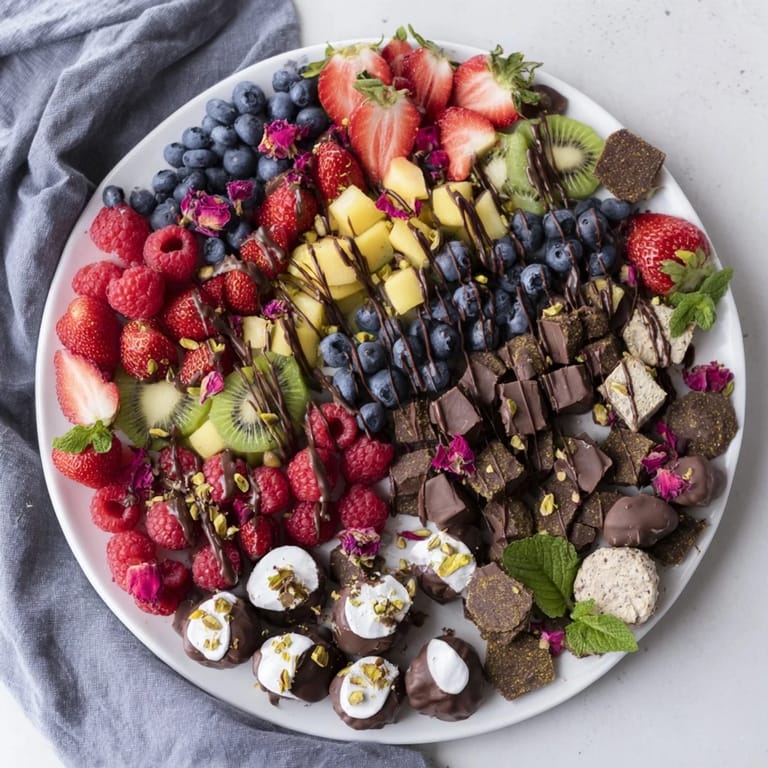
Save I still remember the first time I created a dessert platter like this one—it was for my sister's engagement party, and I was nervous about whether it would look elegant enough. But as I arranged those jewel-toned berries, golden truffles, and pastries in neat rows, something magical happened. What started as ingredients on a board became a canvas, and suddenly I realized that dessert could be an edible work of art. That platter became the centerpiece of the evening, and people kept coming back not just for the taste, but because it was so beautiful to look at. Now whenever I need to impress a crowd, this is what I create.
There's something special about watching people's faces light up when they see a board like this. I made one for a dinner party last year, and instead of everyone rushing to eat, they all stopped to take photos first. That moment taught me that a beautiful dessert board is as much about the experience of gathering around it as it is about the flavors themselves.
Ingredients
- Strawberries (1 cup, halved): These are your showstoppers—their bright red color anchors the whole board. I always choose the ripest ones I can find because that deep color makes everything else pop.
- Blueberries (1 cup): These little gems roll everywhere, so keep them in a cluster or nestle them between other items. They're also nature's way of adding jewel tones to your arrangement.
- Raspberries (1 cup): These are delicate, so add them last and handle gently. Their deep burgundy color creates beautiful shadows across the board.
- Kiwis (2, peeled and sliced): The bright green interior is a revelation when you arrange them—it brings freshness and a pop of unexpected color.
- Mango (1, peeled and cubed): The golden cubes add warmth to your palette. I learned the hard way to cut these just before assembly, or they get a bit watery.
- Assorted truffles (1 cup): These are your luxury touch. Choose a mix of flavors and colors—dark, milk, white, maybe some with a hint of gold leaf if you're feeling fancy.
- Chocolate-covered almonds (1 cup): The crunch matters here. These bridge the gap between fruity and indulgent.
- Mini brownies or brownie bites (1 cup): Store-bought is perfectly fine—I'm not judging. These add a rich, grounding element.
- Assorted macarons (1 cup): These are the architecture of elegance. They're expensive, so this is where you justify splurging on yourself.
- Shortbread or butter cookies (1 cup): These fill the gaps and add a buttery contrast. They're humble but essential.
- Dark chocolate chips (1 cup for melting): Use good quality here—the chocolate drizzle is what ties everything together visually, so it's worth the upgrade.
- White chocolate chips (1/2 cup for melting): The contrast between dark and white chocolate drizzles creates that professional-looking finish.
- Chopped pistachios (2 tablespoons): Their pale green and slightly purple hue adds sophistication. Plus, that little crunch is unexpected and delightful.
- Dried rose petals (2 tablespoons, optional): These whisper elegance without shouting. They're optional, but they're the detail that makes people think you're fancier than you actually are.
- Fresh mint leaves, for garnish: These add freshness and literally frame your creation. Tuck them in at the last moment for visual appeal.
Tired of Takeout? 🥡
Get 10 meals you can make faster than delivery arrives. Seriously.
One email. No spam. Unsubscribe anytime.
Instructions
- Set Your Stage:
- Choose a large serving board or platter—this is your canvas. I learned that wood boards feel warmer and more inviting than white platters, but choose what feels right to you. Lay everything out before you start arranging. This isn't just organization; it's the moment where you can see your color palette come together and make adjustments before anything is locked into place.
- Prepare Your Fruits with Care:
- Wash and dry your fruits thoroughly—any moisture will make the board look sloppy after a few minutes. Slice your strawberries, kiwis, and mangoes into neat, uniform pieces. This is where patience pays off. Keep your berries whole; their roundness is part of what makes the board visually interesting. Work on this about 15 minutes before you plan to serve, or cover with plastic wrap in the fridge.
- Melt Your Chocolate Like a Pro:
- In two separate microwave-safe bowls, melt your dark and white chocolate chips in 30-second bursts. Stir between each burst until smooth and glossy. This method prevents scorching, which is the enemy of good chocolate. If you don't have a microwave, a double boiler works beautifully—it's actually more meditative. The chocolate should be warm enough to drizzle but not hot enough to burn your fingers.
- Build Your Arrangement with Intention:
- This is where the magic happens. Start with your fruits, arranging them in symmetrical layers or sections. If you place strawberries on the left, mirror them on the right. The rhythm of repetition creates visual harmony. Think of it like composing a photograph—the eye should be able to follow a natural path around the board. Place your truffles, macarons, and brownies in neat, alternating rows or circles. I usually work from the center outward, or from one end to the other, depending on my board's shape.
- Fill the Gaps Strategically:
- Use your cookies and chocolate-covered almonds to fill any empty spaces, maintaining that sense of balance. Nothing should look random or rushed. Step back occasionally and look at your board from different angles. What seems crowded up close might look perfectly composed from a distance.
- Drizzle with Artistic Flair:
- Using a spoon or piping bag, drizzle your melted dark and white chocolate over the fruits and sweets in decorative lines or swirls. I prefer a spoon because it feels more natural and less intimidating than a piping bag. Let the chocolate flow where it wants to go—imperfection is actually more interesting than precision here. Thin lines are better than thick globs; you want to suggest elegance, not smother the board.
- Add the Finishing Touches:
- Sprinkle your chopped pistachios and dried rose petals over the top. These small details are what elevate this from a simple spread to something that feels thoughtfully curated. Garnish with fresh mint leaves tucked between items and scattered across the surface. Green against all those rich colors creates a sense of freshness.
- Serve with Intention:
- If you're serving immediately, you're perfect. If you need to refrigerate, cover loosely with plastic wrap to prevent the chocolate from cracking. When you bring this to the table, do it with confidence. This is a showstopper, and you made it happen.
 Save
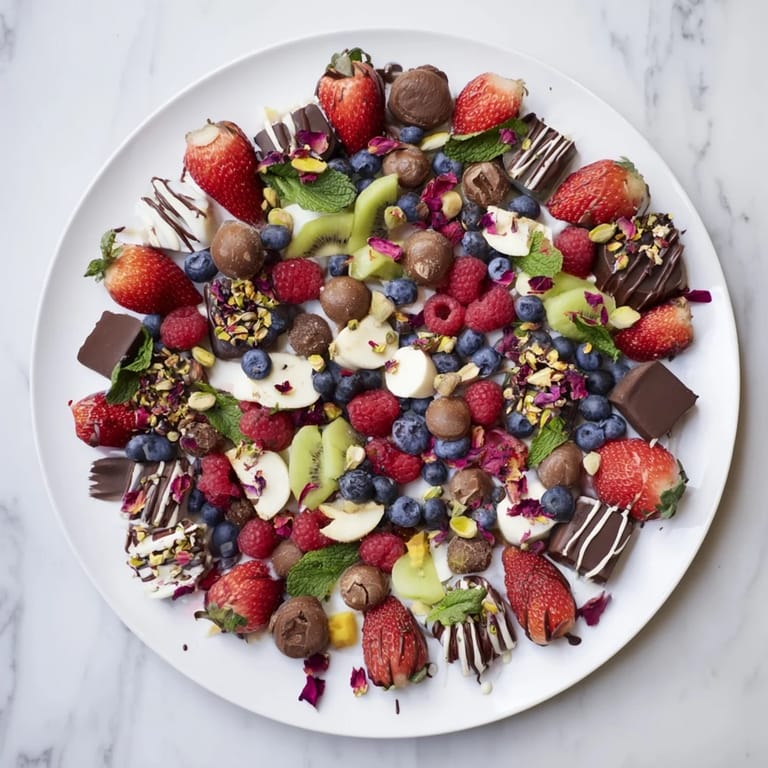
Save I made this board for a friend going through a tough time, and as she looked at it, she actually started crying—not sad tears, but the kind that come when someone realizes they're cared for. That's when I understood that a beautiful dessert board isn't just about indulgence; it's about saying 'you matter enough for me to put thought and care into this moment with you.' That's the real recipe.
Choosing Your Components Wisely
The secret to a board that actually tastes amazing is variety in both flavor and texture. I learned this the hard way when I once made a board with too many fruity elements and not enough richness to balance it. Now I think of it like composing a meal: you need the fresh, the indulgent, the crunchy, and the smooth. Quality matters, but not in the way you might think. Your truffles don't need to be from a fancy chocolatier (though they can be), but they should be ones you'd actually want to eat. The same goes for macarons—authentic French ones are beautiful, but a good local bakery's version might bring more joy because of where they came from. Choose components you genuinely love, not just ones that look impressive.
Making It Your Own
This template is just the beginning. I've started adding seasonal touches: in summer, I add fresh lemon curd in a small bowl for dipping. In fall, I've been known to roast some grapes and add them for a concentrated sweetness. The rules are loose here. Want to use different fruits? Go for it. Prefer white chocolate over dark? Your board, your rules. The only thing that really matters is that you're creating something that speaks to you and that you're excited to share.
The Art of Timing and Presentation
There's a perfect window for serving a dessert board, and it's shorter than you might think. The chocolate will set fully in about 10 minutes at room temperature, and the fruits stay freshest for about an hour. If you're prepping ahead, do everything except the chocolate drizzle and final garnishes. Then finish those touches right before people arrive. There's something about presenting a freshly finished board that feels special. And if you're photographing it (let's be honest, you probably are), do it from above at a slight angle—that's where the symmetry and colors really sing.
- Keep extra fruit and chocolate components in the fridge in case someone wants seconds
- Have small plates and forks nearby—this is finger food, but people appreciate having options
- If you're serving wine, champagne or a sweet dessert wine is the way to go
 Save
Save Every time I set down one of these boards, I'm reminded that the most beautiful thing about feeding people isn't the calories or the nutrition—it's the moment of connection that happens when everyone gathers around something gorgeous and shares it together. This board is your canvas for creating those moments.
Recipe Questions & Answers
- → How do I achieve the symmetrical arrangement?
Start by placing fruits in mirrored layers on opposite sides, then alternate chocolates and sweets in neat rows or circles to maintain balance.
- → What is the best way to melt chocolate smoothly?
Melt chocolate chips in 30-second intervals in the microwave, stirring between each until smooth, or use a double boiler for gentle heating.
- → Can I customize the fruits used for this platter?
Yes, you can add or substitute fruits like grapes or apple slices to suit your preference or availability.
- → How should I garnish the platter for added texture?
Sprinkle chopped pistachios and dried rose petals for color and crunch, and add fresh mint leaves for a refreshing touch.
- → Are there gluten-free options for this dessert selection?
Use gluten-free cookies and brownies to make the platter suitable for gluten-sensitive guests.
- → What tools are recommended for arranging and drizzling?
Use a large serving board, small bowls for melting chocolate, and piping bags or spoons to drizzle chocolate decoratively.